How to configure Enterprise cloud
Firmware Version: 4.5 and above
Note: Before configuring Enterprise Cloud on GajShield, make sure you have a cloud license.
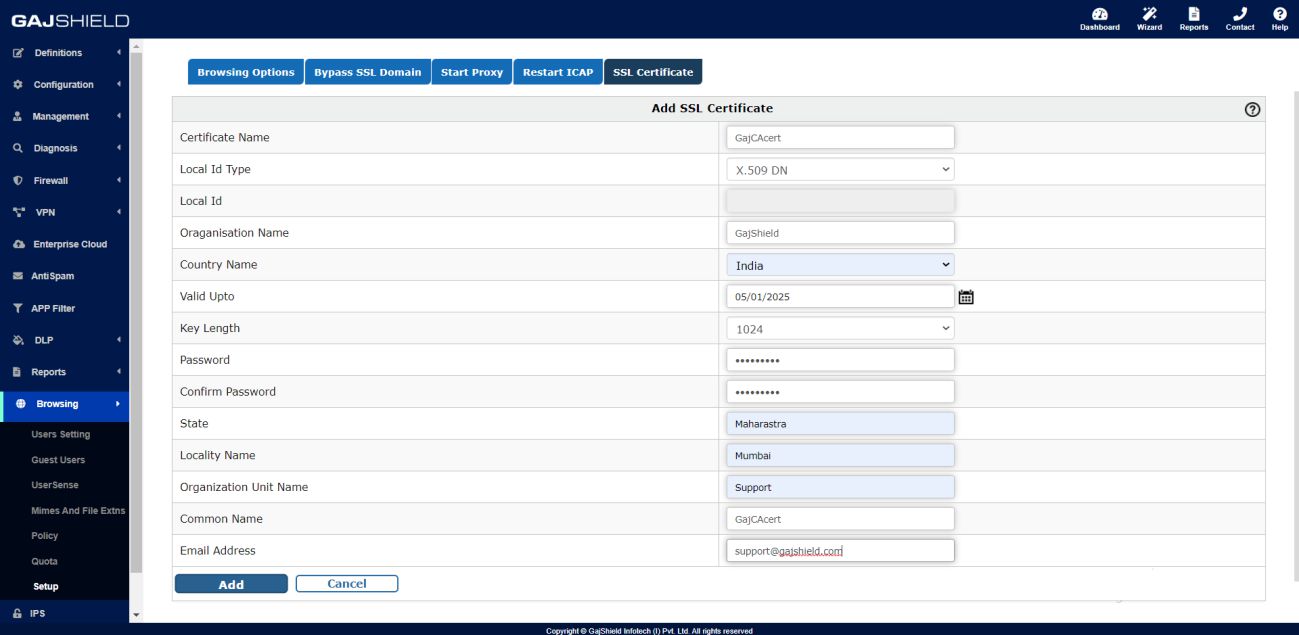
Note: If you find that CA certificate has been created beforehand, it is the same certificate created under Browsing >> Setup >> SSL Certificate used for scanning https browsing traffic. You have to now configure additional information fields specified below
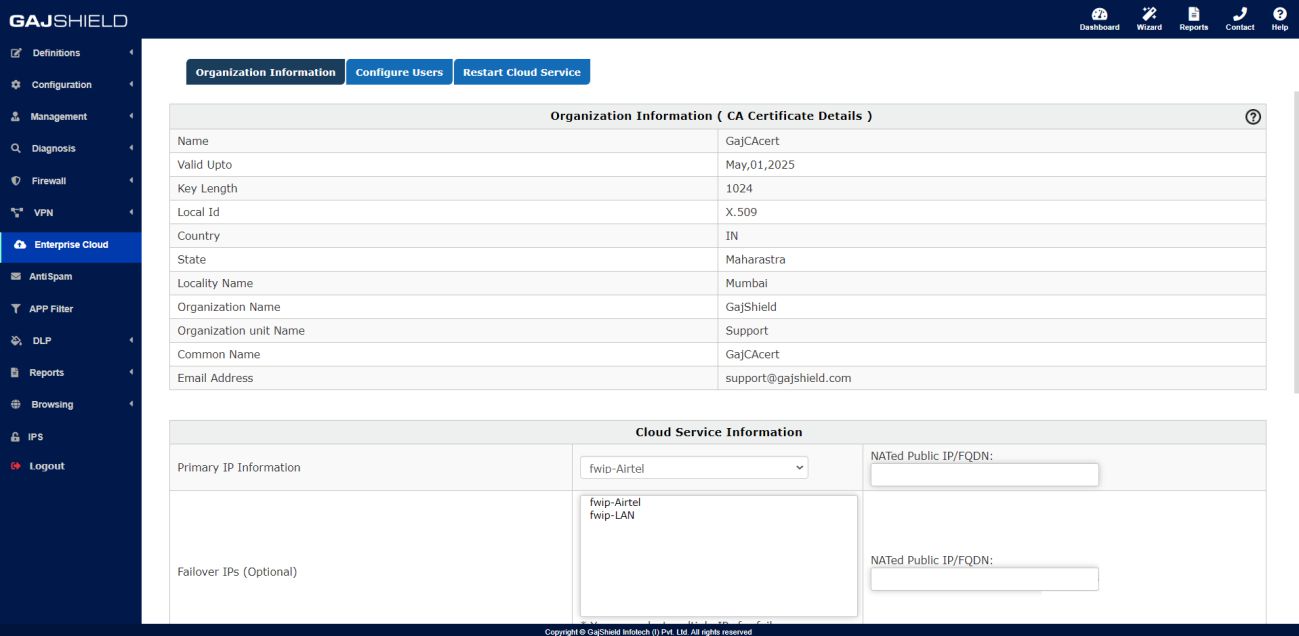
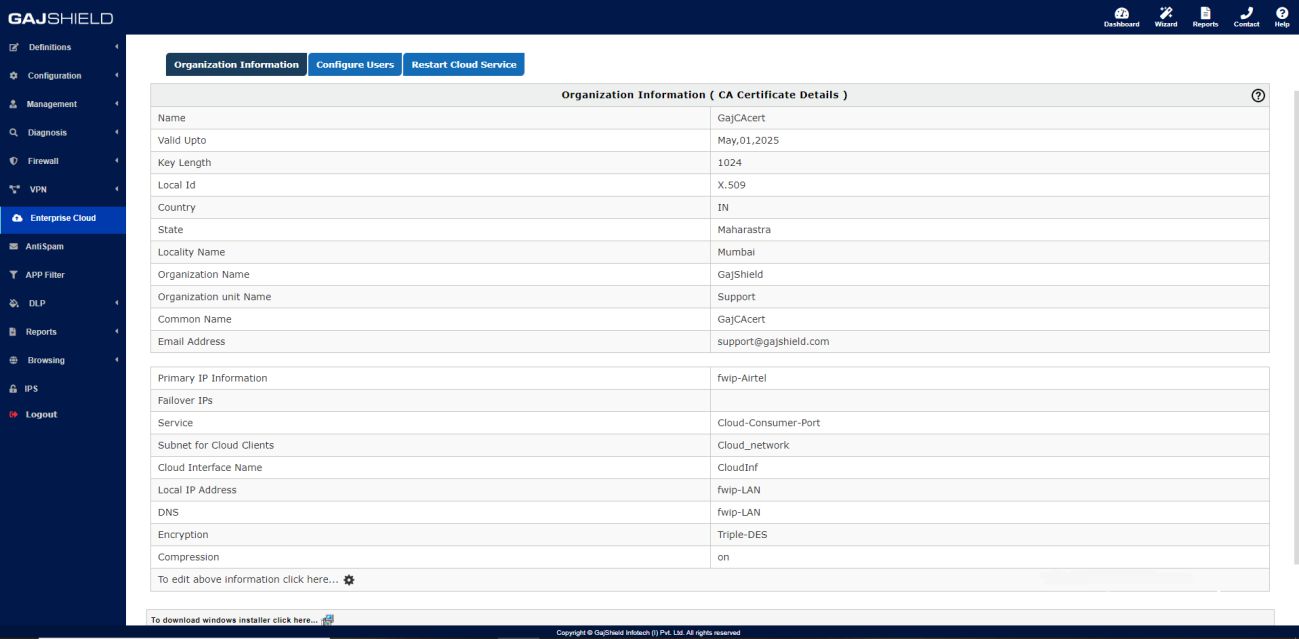
Go to Enterprise Cloud tab >> Go to Organization Information and fill in the details to configure cloud service information.
If not, you'll have to add all the CA certificate information under Enterprise Cloud -> Organization Information
- Certificate Name: A unique name to identify the CA Certificate.
- Valid up to: Date till which the CA Certificate is valid, after which the certificate expires.
- Key Length: The encryption key size, more the key length, greater the security level & more processing power required.
Note: Certificate should have key length value set to 1024
- Password: The password/passphrase for the CA Certificate.
- Local ID: The Local Identifier for the Certificate helps the firewall to identify the CA Certificate.
#FQDN: The Fully Qualified Domain Name (FQDN), FQDN must be in ASCII format. For example, myhost.test.com.
#X.509 DN: An X.509 certificate binds a name to a public key value. The role of the certificate is to associate a public key with the identity contained in the X.509 certificate.
#IP Address: IP address the certificate is associated with. It can be any IP address. For example, 125.11.12.13
#Email: Email address the certificate is associated with. For example, support@gajshield.com
- Country Name: Select the country where the firewall is installed.
- State / Locality Name: State and Locality are full names, i.e. 'California', 'Los Angeles'.
- Organization Name: Full Legal Company or Personal Name, as legally registered.
- Organizational Unit Name: In whichever branch of your company the firewall is getting installed. For example, Accounting, IT etc.
- Common Name: Common name is a mandatory bit of uniquely identifying data, such as FQDN or Personal Name.
- Email Address: Insert support email address in case of issues.
1. Important: If your current certificate expires and you need to create a new certificate, under Browsing >> Setup >> SSL Certificate after creating the certificate, go to
Enterprise Cloud >>Organization.
Information & click on, without doing any changes in the configuration click on save. After recreating the certificate, you will need to delete the old cloud exe under Configuration Users and create new cloud exe.
2. Select Cloud configuration as required, under Cloud Service Information.
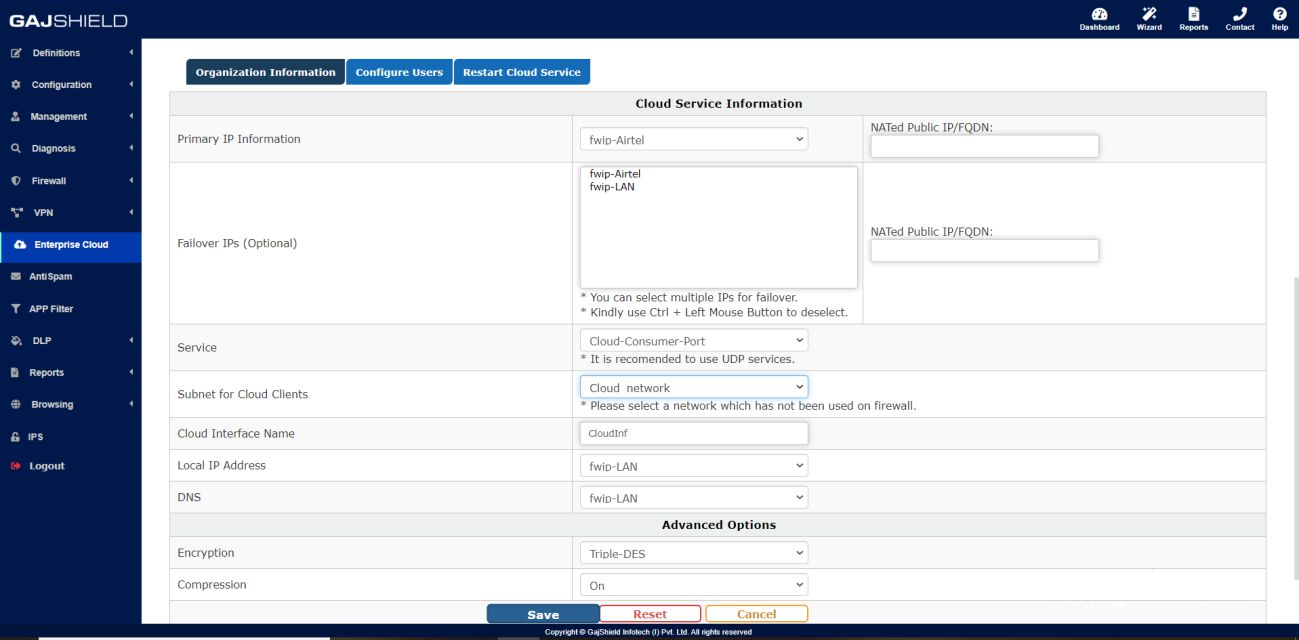
- Primary IP Information: First priority will be given to this IP by Cloud client.
- Failover IPs (Optional): Select multiple IP’s of different ISP for failover. Second priority will be given to failover IP’s, when primary IP is not reachable.
- Service: Create / select port for the cloud client to link with GajShield, use port number greater than 1024 TCP / UDP.
Note: UDP ports / services will not work when selecting cloud failover option
- Subnet for Cloud Client: Cloud Clients will use IP address from this Subnet once the clients connect to GajShield.
- Local IP Address: Cloud Clients would connect to the LAN network through IP.
- DNS: Public or Private IP which can be used by Cloud Clients to resolve DNS to browse Internet / intranet.
- Encryption: Data is encrypted between the Cloud client and GajShield firewall, using (Blowfish, AES & Triple-DES). Select any one from the drop-down list.
- Compression: Traffic travelling between the cloud client and GajShield firewall is compressed, when this option is kept ON.
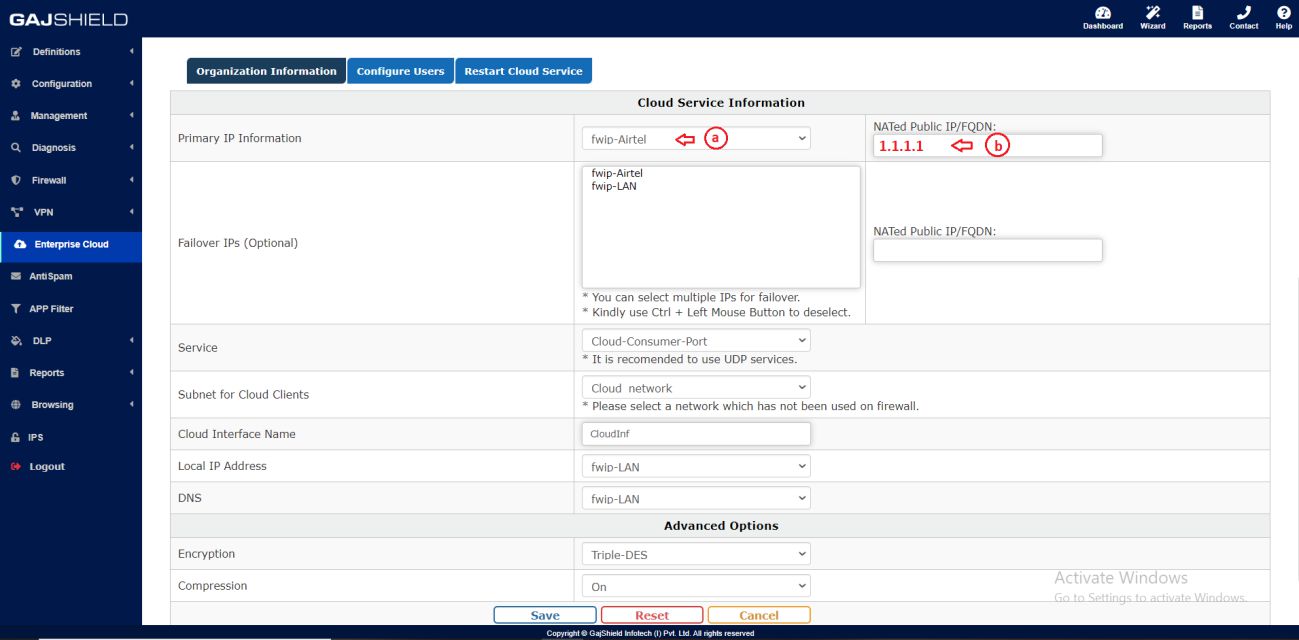
3. Final Cloud configuration will look like the below image.
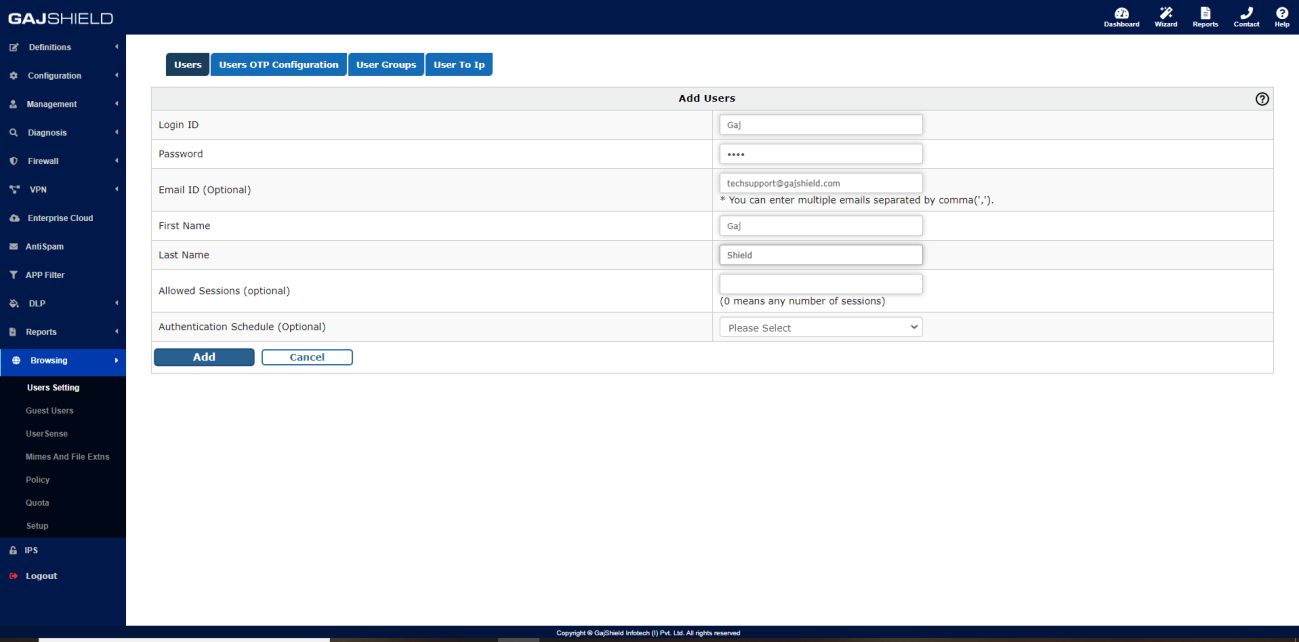
4. Now you need to create a user from Browsing >> User Setting >> Users >> +
After adding fields click on Add button.
5. Go to Enterprise Cloud >> Configure Users >> +
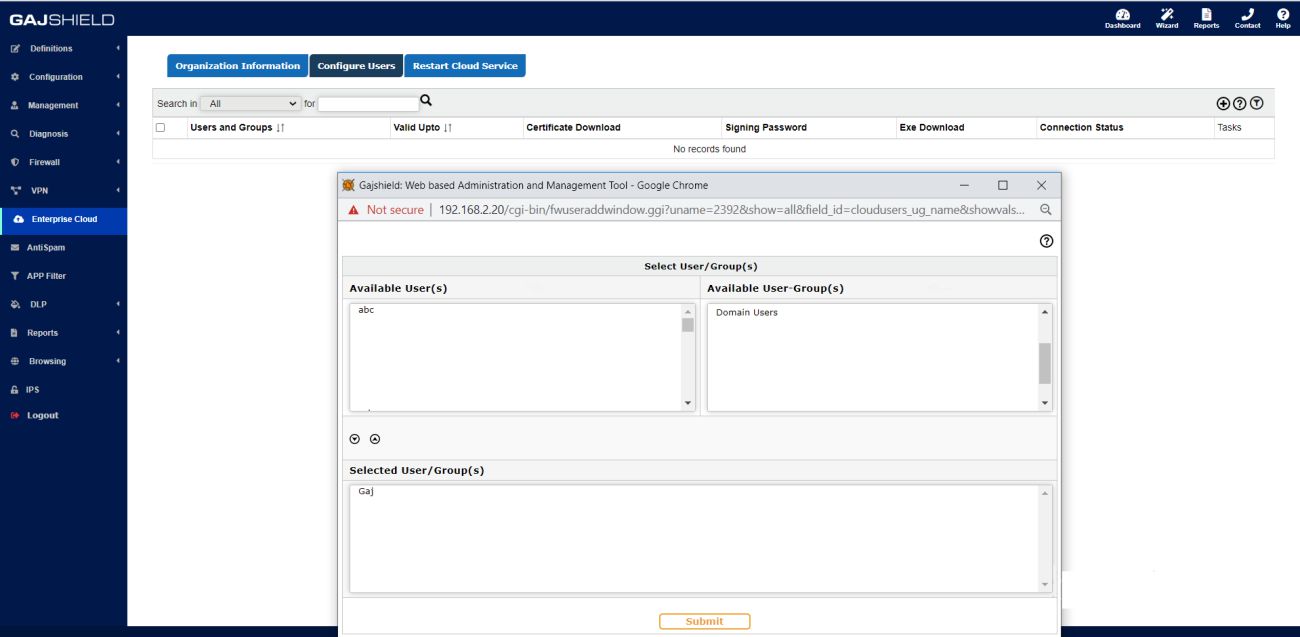
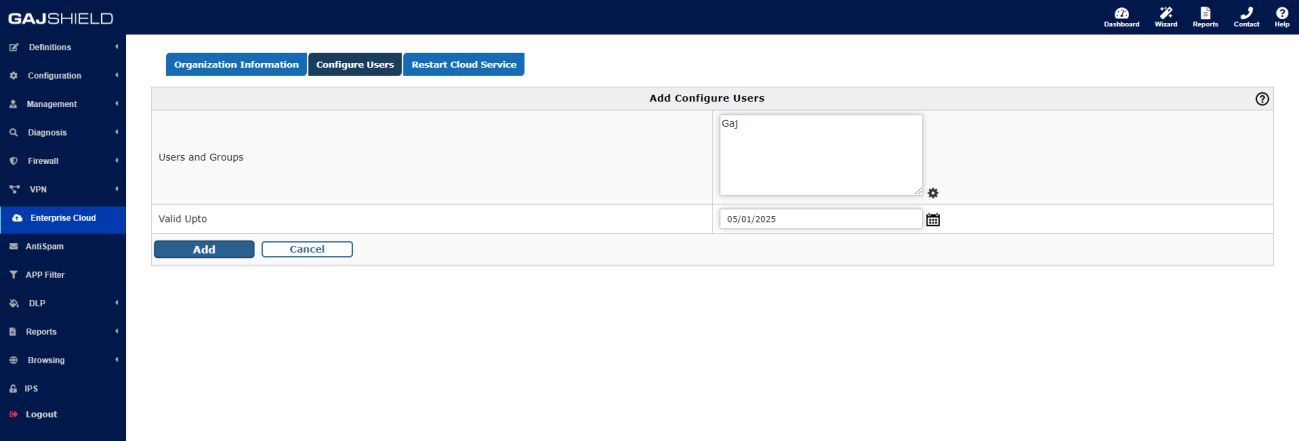 |
- Move users or group by simply selecting them and clicking on, from Available Users or Available Groups tab to Selected Users & Users Group List. To remove user or groups from Selected Users & Users Group List, select the users or group and click on.
- Valid Up to: Set expire date by clicking on for the cloud client, after the said date the cloud client will not be functional.
Note: To add new users or group in clouds Available Users or Available Groups list, add them from Browsing >> Users setting.
6. After adding the user to cloud services, sign the exe by clicking on Click here to sign


- Insert same password in both the boxes and click on submit.
Note: This password can be used to disconnect or uninstall the cloud client.
Important: Restart Cloud Service, if you make any changes in Organization Information tab.
7. Now you can download the cloud client exe by clicking on . If you want to download only the user certificate click on save the zip folder containing 3 files. For example (ca.crt, guest-client.crt, guest-client.key)
Important: Install cloud client on normal user login, & use "Run as Administrator" to install cloud client.

8. To change password of the cloud client on users PC, where the cloud client is installed. Right click on cloud icon shown on the right side of your taskbar. Select Change Password, a pop-up will open insert old password and the new password.
9. If you have forgotten the password of the cloud client exe, you will have to re- create the user exe (repeat step 4 & 5) and download the new user certificate from the firewall (see step 6) and not the cloud client exe. Import the 3 files downloaded from the firewall in the respective boxes as shown below.
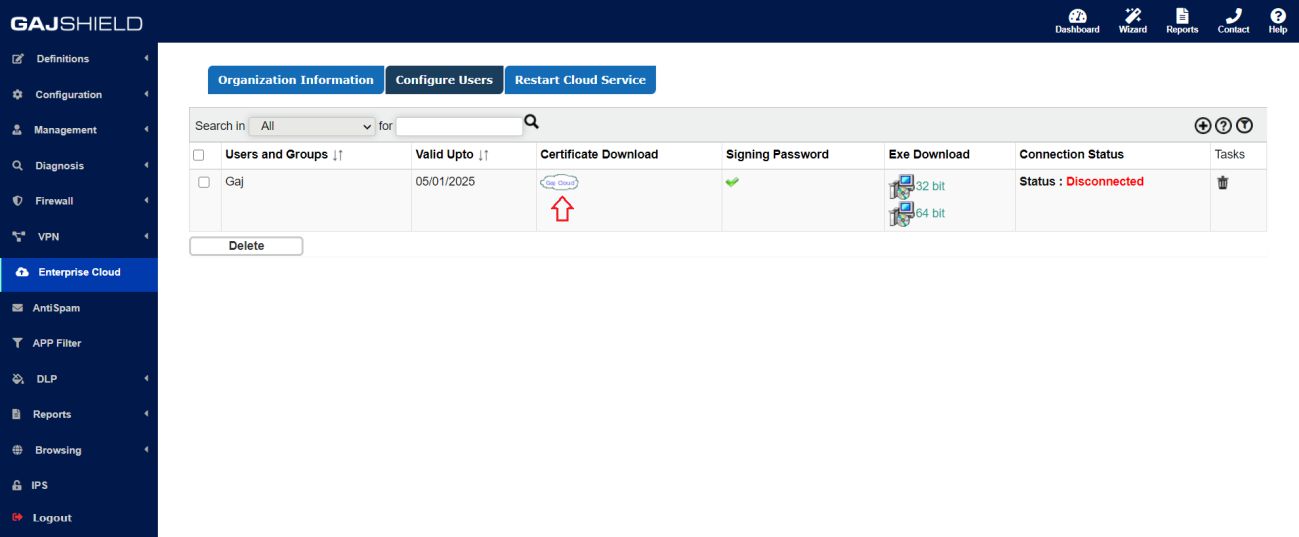
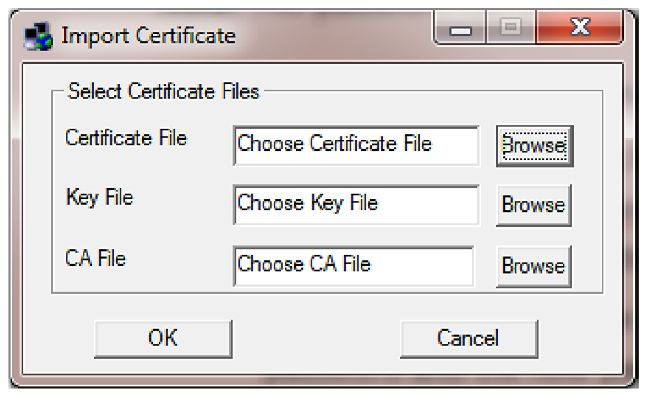
Certificate downloaded from the firewall for example is guest-client.zip, contains 3 files as show below
- ca.crt
- guest-client.crt
- guest-client.key
Note: Import the above three files in their respective sections.
- Certificate File: Import “guest-client.crtâ€
- Key File: Import “guest-client.keyâ€
- CA File: Import “ca.crtâ€
10. After configuring enterprise cloud, you will need to add firewall policy to allow mobile users to connect to the firewall.
Go to Firewall >> Policies >> Rules and add policies according to your organizations requirements. Show below is an example of firewall policy for cloud client.

You have successfully configured Enterprise Cloud on your firewall.
Attached Files:
How_to_configure_Enterprise_cloud.pdf